Arduino Project 045 - RFID Servo and LED Control System
Arduino Programming Basic -- RFID Servo and LED Control System
Project 45 RFID Servo and LED Control System


RFID Servo and LED indicator Control System
/* Project 45 RFID - Access Servo and Control / Gate LED indicator
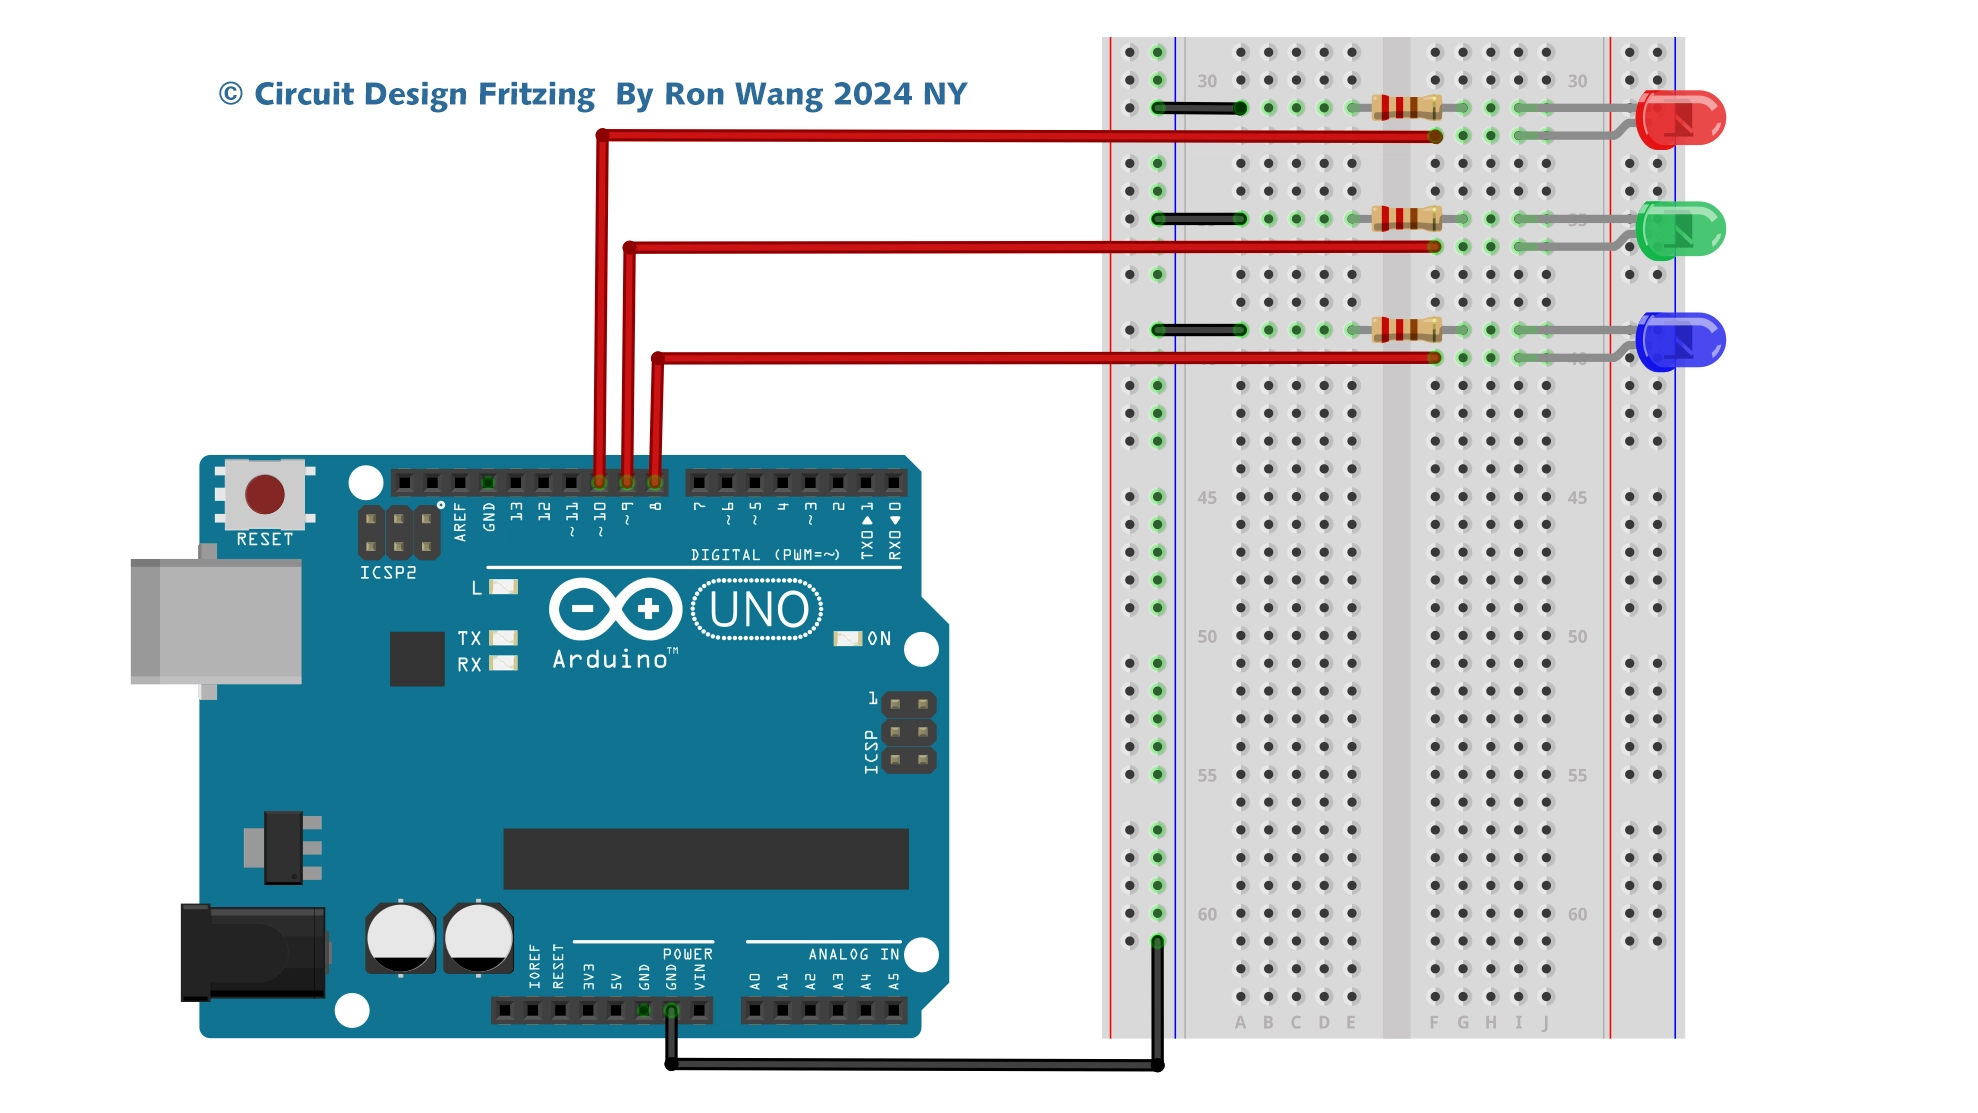
Circuit Design By Ron Wang 2024 NY
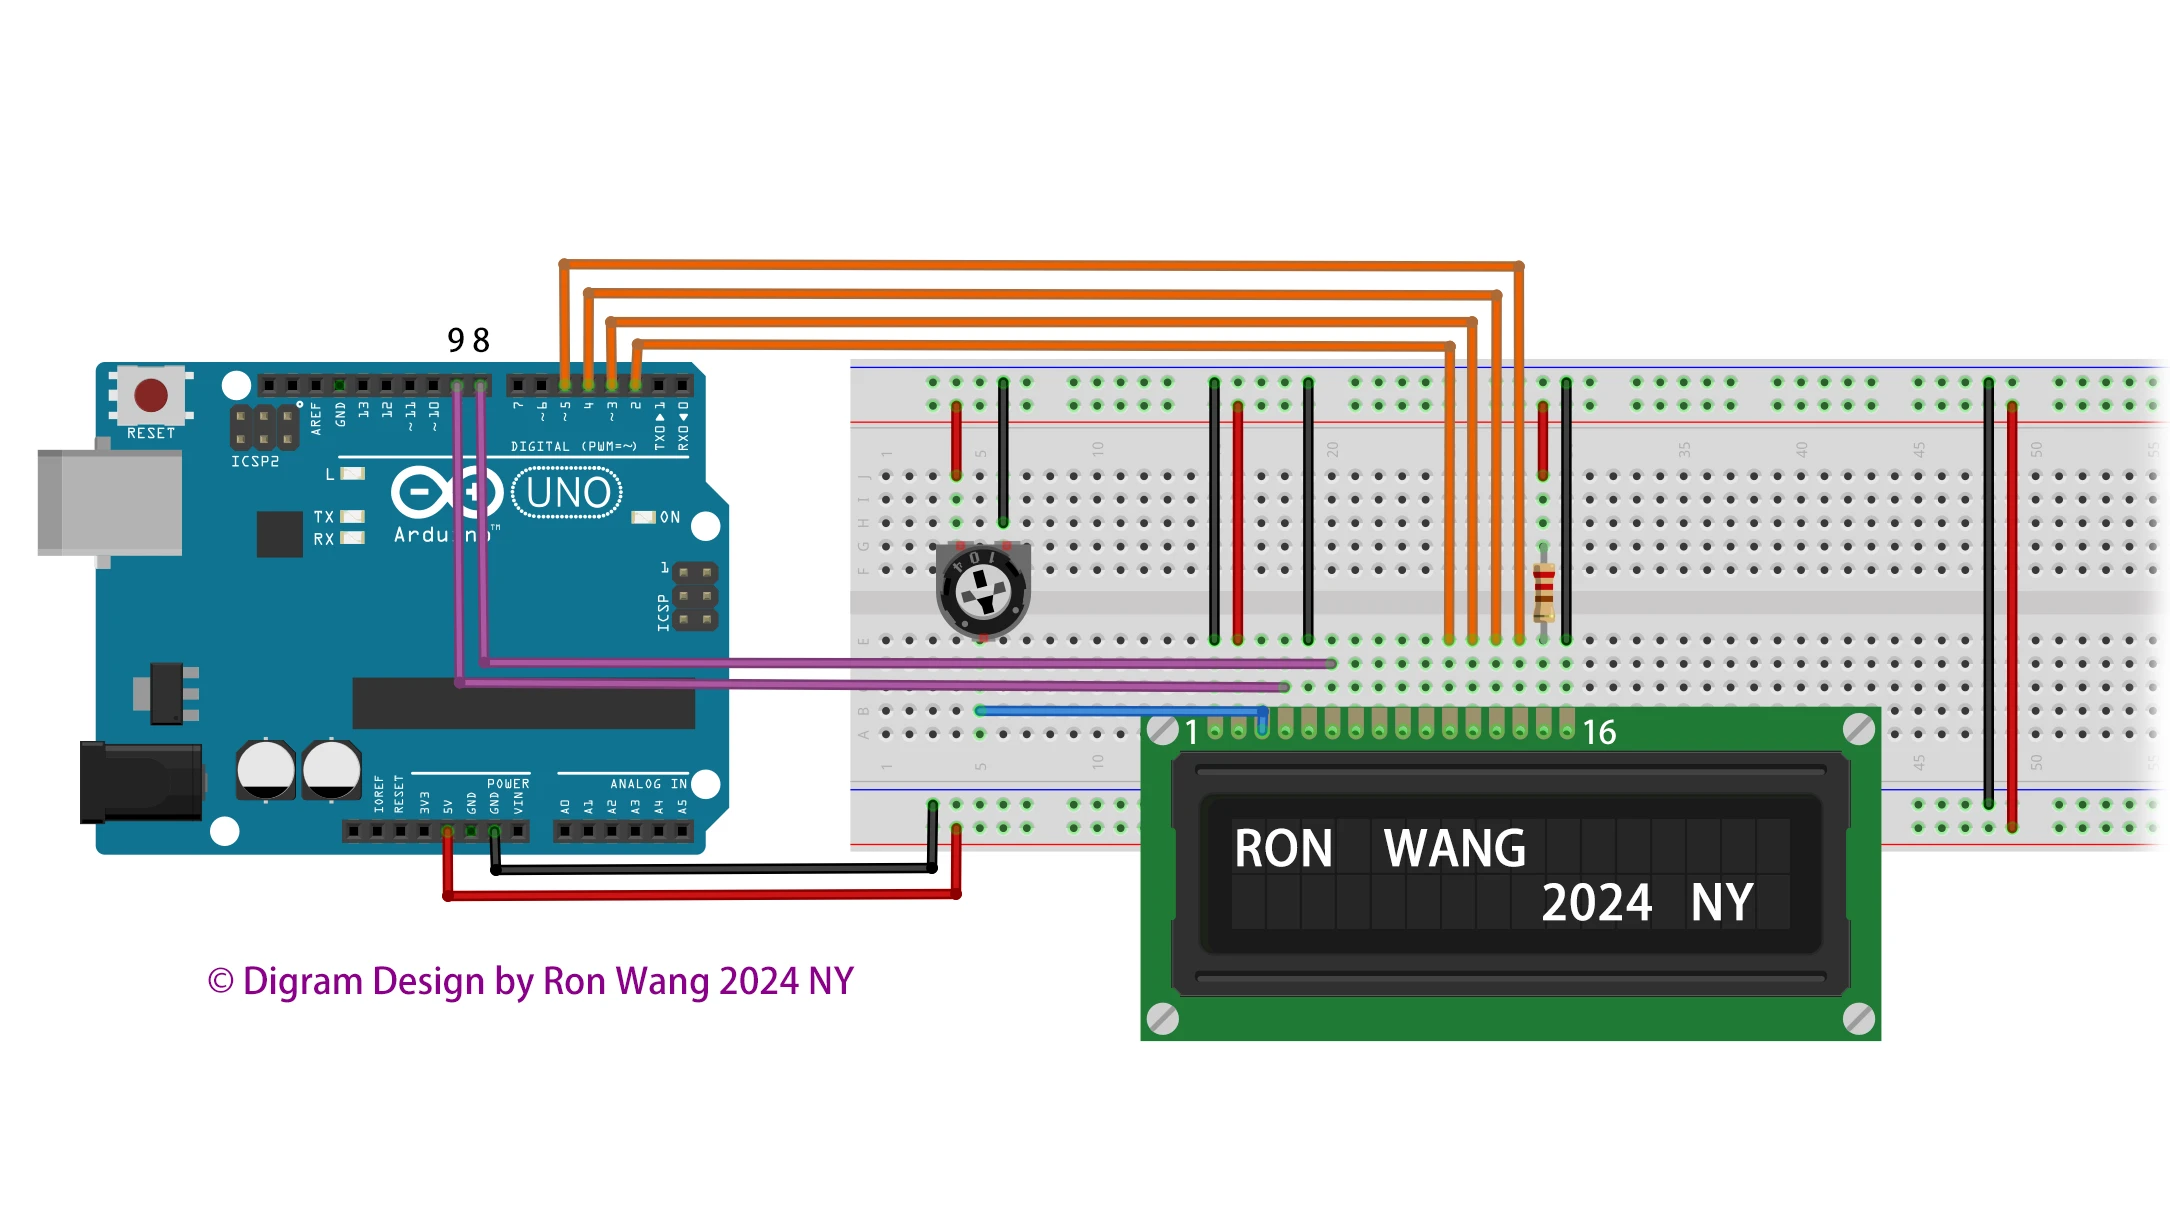
Schematic Design By Ron Wang 2024 NY
*/
#include <SPI.h>
#include <MFRC522.h>
#include <Servo.h>
Servo microservo9g;
#define SS_PIN 10 // RC522 module pin definitions
#define RST_PIN 9
MFRC522 mfrc522(SS_PIN, RST_PIN);
int led_concedido = 5; // Leds indicating access granted or denied
int led_negado = 6;
char st[20];
void setup()
{
pinMode(led_concedido, OUTPUT);
pinMode(led_negado, OUTPUT);
// Defines that the servo is connected to digital port 3
microservo9g.attach(3);
// Moves the servo to the start position (cancel closed)
microservo9g.write(90);
// Start the serial
Serial.begin(9600);
// Start SPI Bus
SPI.begin();
// Start MFRC522
mfrc522.PCD_Init();
// Initial messages on the serial monitor
Serial.println("Bring your card closer to the reader...");
Serial.println();
}
void loop()
{
// Wait for the card to approach
if ( ! mfrc522.PICC_IsNewCardPresent())
{
return;
}
// Select one of the cards
if ( ! mfrc522.PICC_ReadCardSerial())
{
return;
}
// Show UID on serial
Serial.print("UID da tag :");
String conteudo= "";
byte letra;
for (byte i = 0; i < mfrc522.uid.size; i++)
{
Serial.print(mfrc522.uid.uidByte[i] < 0x10 ? " 0" : " ");
Serial.print(mfrc522.uid.uidByte[i], HEX);
conteudo.concat(String(mfrc522.uid.uidByte[i] < 0x10 ? " 0" : " "));
conteudo.concat(String(mfrc522.uid.uidByte[i], HEX));
}
Serial.println();
Serial.print("Mensagem : ");
conteudo.toUpperCase();
// Test if card2 has been read,you can modification the Value your RFID tag value
if (conteudo.substring(1) == "C1 41 38 1D")
{
// Raises the gate and lights the green LED
microservo9g.write(-90);
digitalWrite(led_concedido, HIGH);
Serial.println("Card1 - Access granted!");
Serial.println();
delay(3000);
microservo9g.write(90);
digitalWrite(led_concedido, LOW);
}
// Test if card2 has been read
if (conteudo.substring(1) == "C1 41 38 1D")
{
Serial.println(";Card2 - Access granted!!!");
Serial.println();
// Flashes the red LED
for (int i= 1; i<5 ; i++)
{
digitalWrite(led_negado, HIGH);
delay(200);
digitalWrite(led_negado, LOW);
delay(200);
}
}
delay(1000);
}
版权声明:本文为原创文章,版权归donstudio所有,欢迎分享本文,转载请保留出处!