
Arduino Project 017 - Shift Register 8-Bit Binary Counter
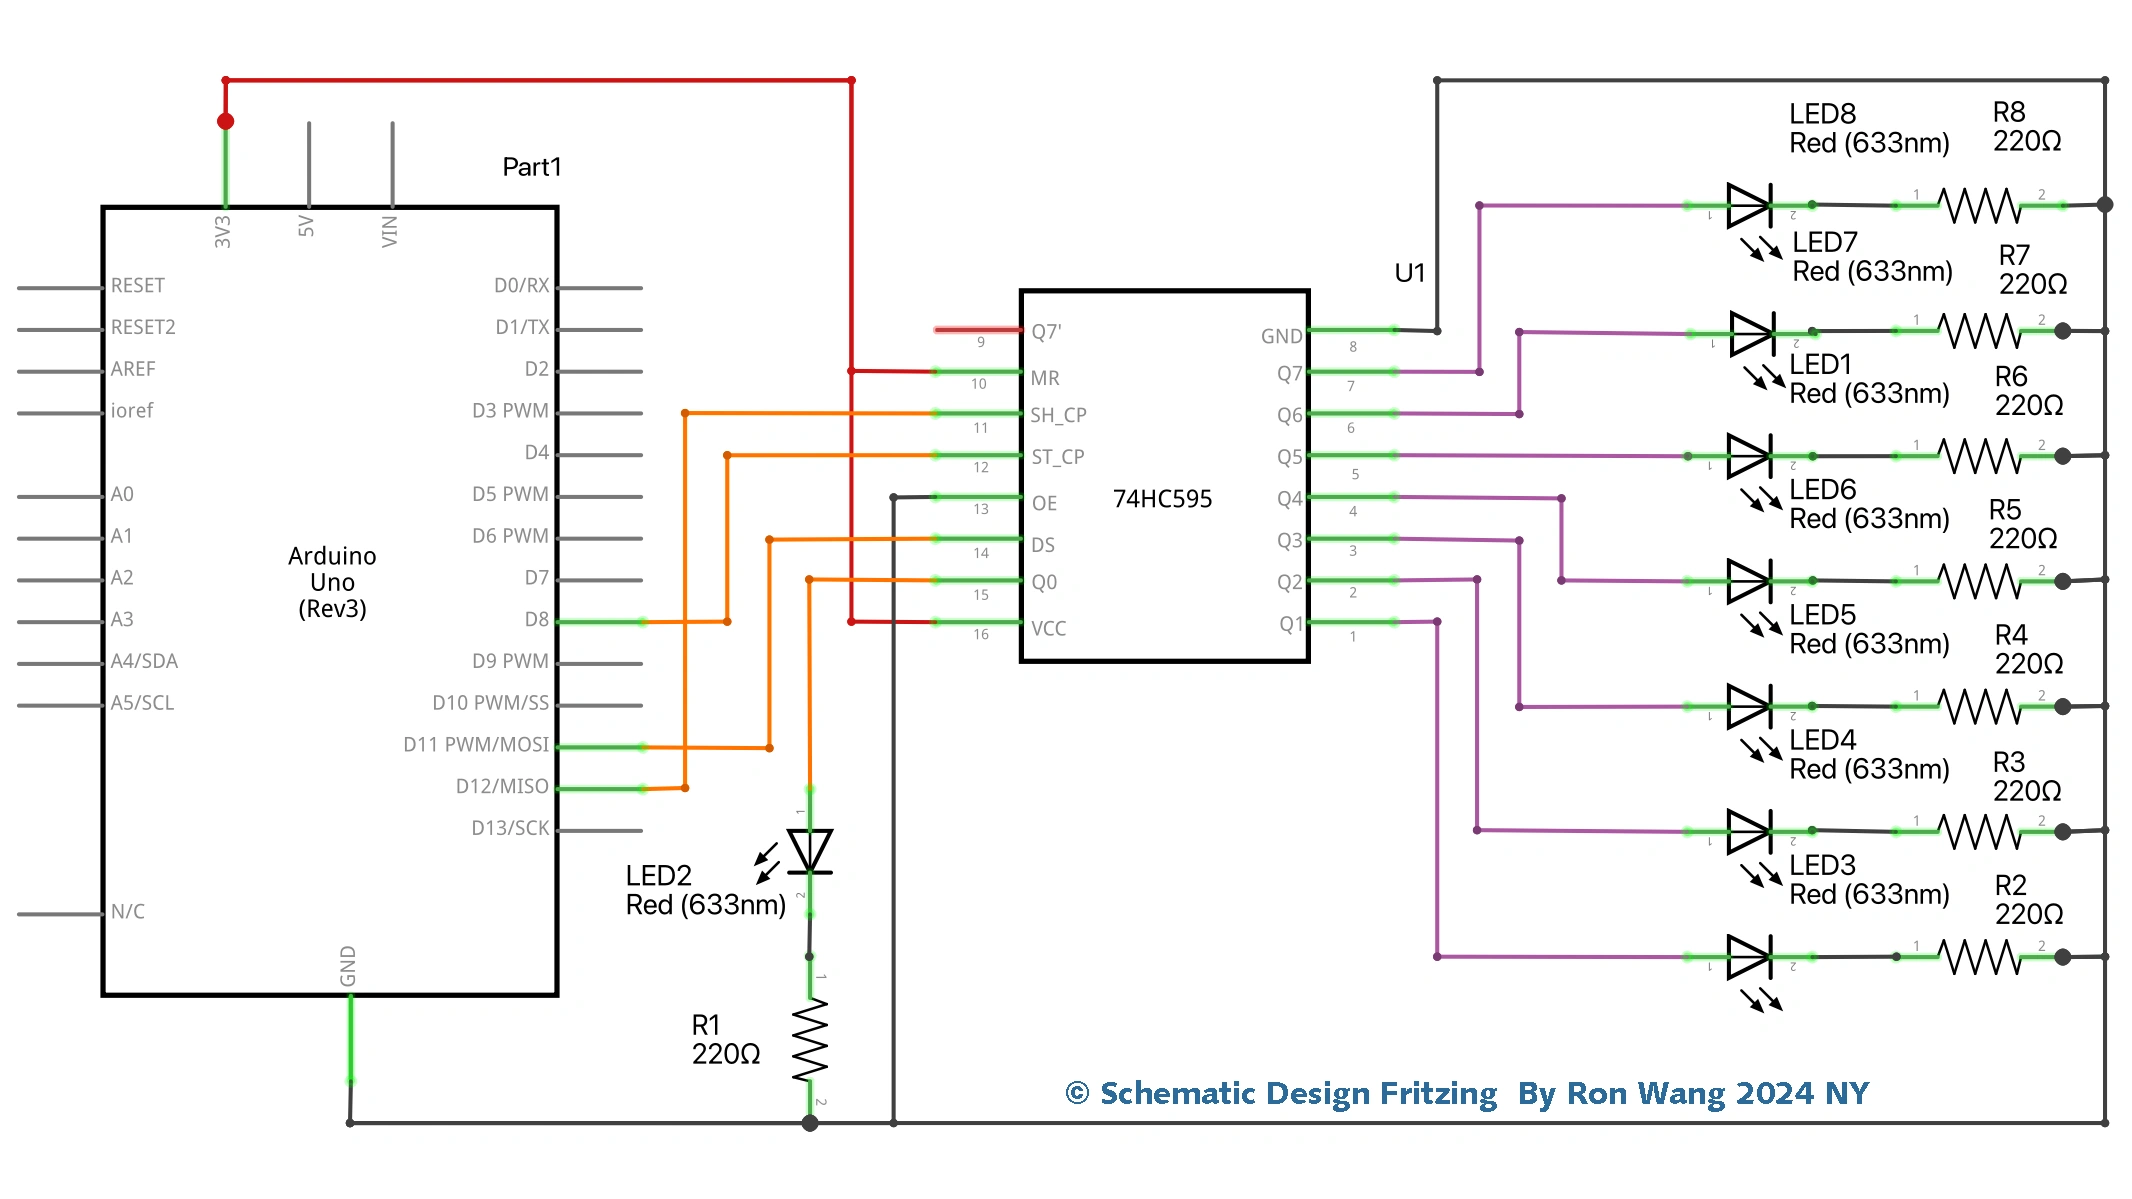
In this project, you’re going to use additional ICs (Integrated Circuits) in the form of shift registers in order to drive LEDs to count in binary (I will explain what binary is soon). Specifically, you will drive eight LEDs independently using just three output pins from the Arduino.
项目 Project 17 Shift Register 8-Bit Binary Counter
/* Coding Ron Wang
   Sep.10th 2024
   Autaba support for coding hardware
   Project 17 Shift Register 8-Bit Binary Counter
 */
int latchPin = 8; //Pin connected to Pin 12 of 74HC595 (Latch)
int clockPin = 12; //Pin connected to Pin 11 of 74HC595 (Clock)
int dataPin = 11; //Pin connected to Pin 14 of 74HC595 (Data)
void setup() {
 //set pins to output
 pinMode(latchPin, OUTPUT);
 pinMode(clockPin, OUTPUT);
 pinMode(dataPin, OUTPUT);
}
void loop() {
 //count from 0 to 255
 for (int i = 0; i < 256; i++) {
 //set latchPin low to allow data flow
 digitalWrite(latchPin, LOW);
 shiftOut(i);
 //set latchPin to high to lock and send data
 digitalWrite(latchPin, HIGH);
 delay(1000);
 }
}
void shiftOut(byte dataOut) {
 // Shift out 8 bits LSB first, on rising edge of clock
 boolean pinState;
 digitalWrite(dataPin, LOW); //clear shift register ready for sending data
 digitalWrite(clockPin, LOW);
 for (int i=0; i<=7; i++) { // for each bit in dataOut send out a bit
 digitalWrite(clockPin, LOW); //set clockPin to LOW prior to sending bit
 // if the value of DataOut and (logical AND) a bitmask
 // are true, set pinState to 1 (HIGH)
 if ( dataOut & (1<<i) ) {
 pinState = HIGH;
 }
 else {
 pinState = LOW;
 }
 //sets dataPin to HIGH or LOW depending on pinState
 digitalWrite(dataPin, pinState); //send bit out on rising edge of clock
 digitalWrite(clockPin, HIGH);
 }
 digitalWrite(clockPin, LOW); //stop shifting out data
}
版权声明:本文为原创文章,版权归donstudio所有,欢迎分享本文,转载请保留出处!